studio notes #13
This past week has largely been about Punto en Aria needle lace.
I have an early foundation in fiber arts. I learned basic embroidery when I was still in elementary school and used to embroider messy little animals onto my t-shirts. Since then I've dabbled in crochet, knitting, quilting, and punch needle. I actually originally planned to get my degree in fiber arts but that track was ending the semester I started. I say that because I know just enough about fiber arts to know that I can't pick up a new technique in a weekend and expect to immediately interpret it into my own thing.
Fortunately, needle lace has a lot in common with the embroidery stitches I already know, so I wasn't starting from zero. I've watched several YouTube videos that have been particularly helpful, which I'll link below mostly for my own reference if I need to come back to them later.
The thing I wasn't finding in those tutorials was how to incorporate other materials into the lace. Fortunately, I found a class that starts mid September through Surface Design taught by Katerina Knight, who incorporates petals and other natural elements into her work. I'm hoping to learn from that and figure out how to translate some of those ideas into plastic.
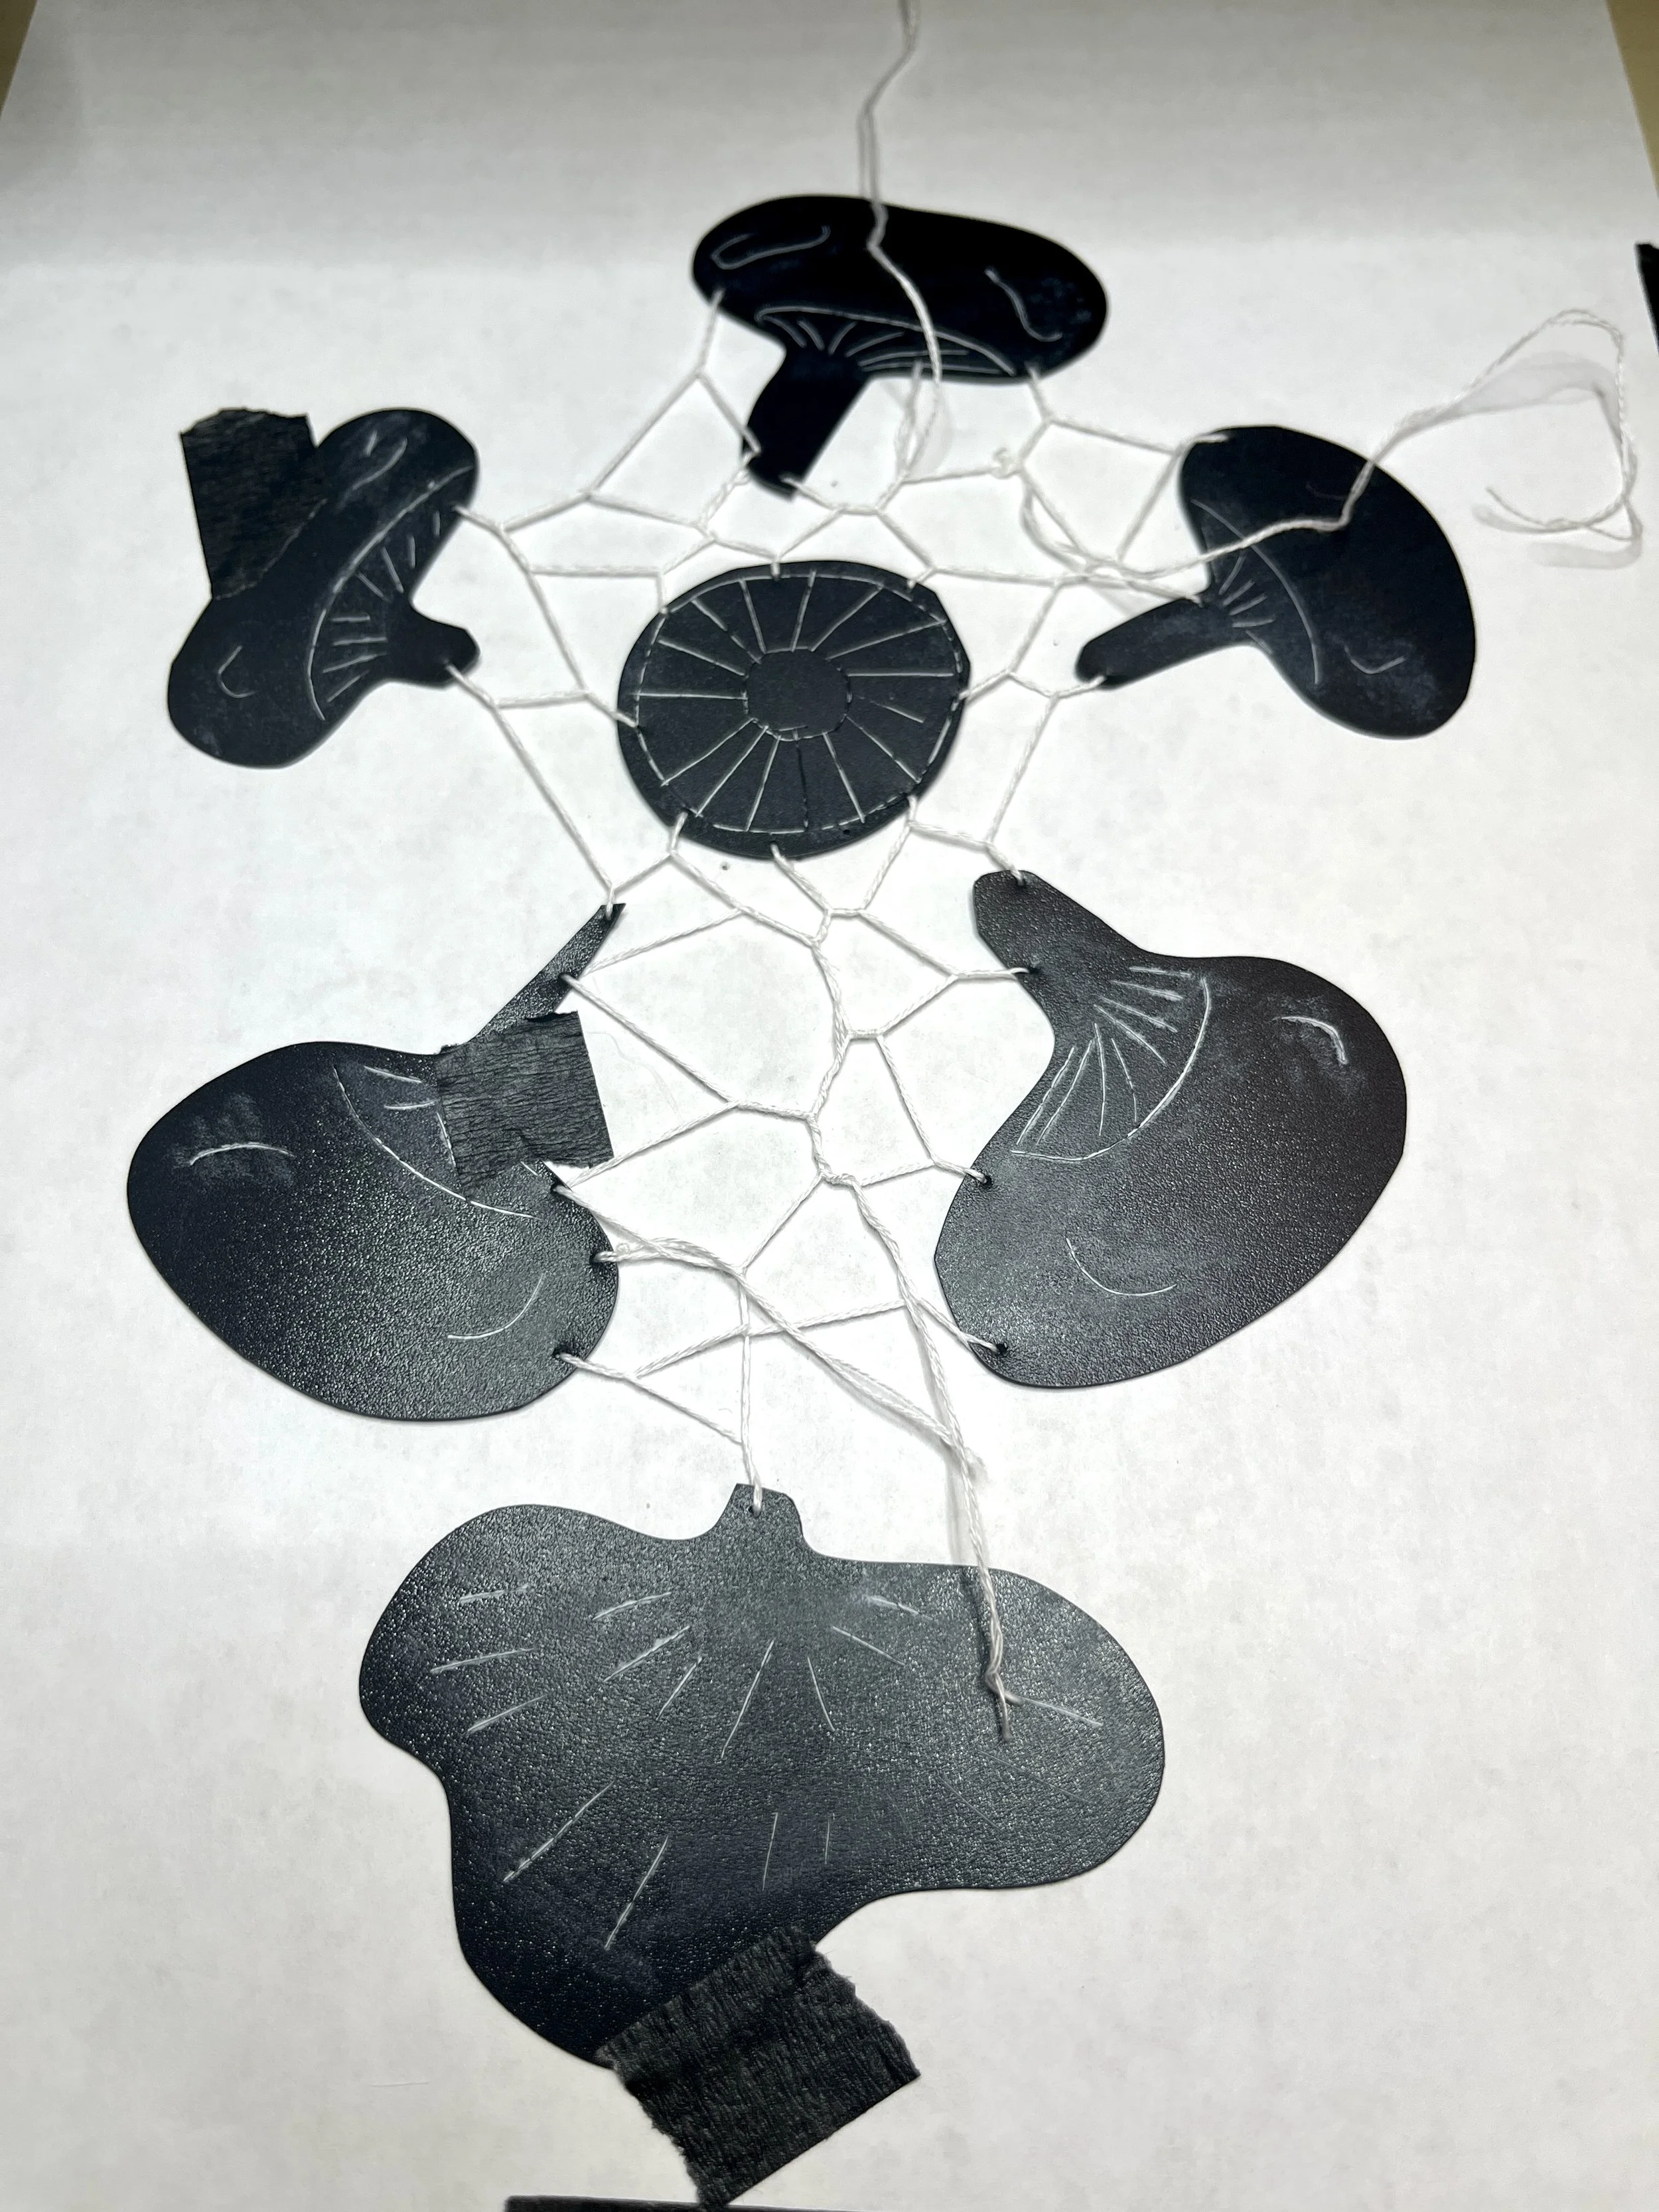
So far I started just using a Venetian bar stitch to fill in the spaces between the plastic mushrooms. Then I saw someone making a Venetian picot, which is basically a little tail or loop that extends from the lace. Seeing those made something click: what if I strategically thickened some of the lines so the lace itself started to look like mycelium spreading throughout the veil?
So I tried it.
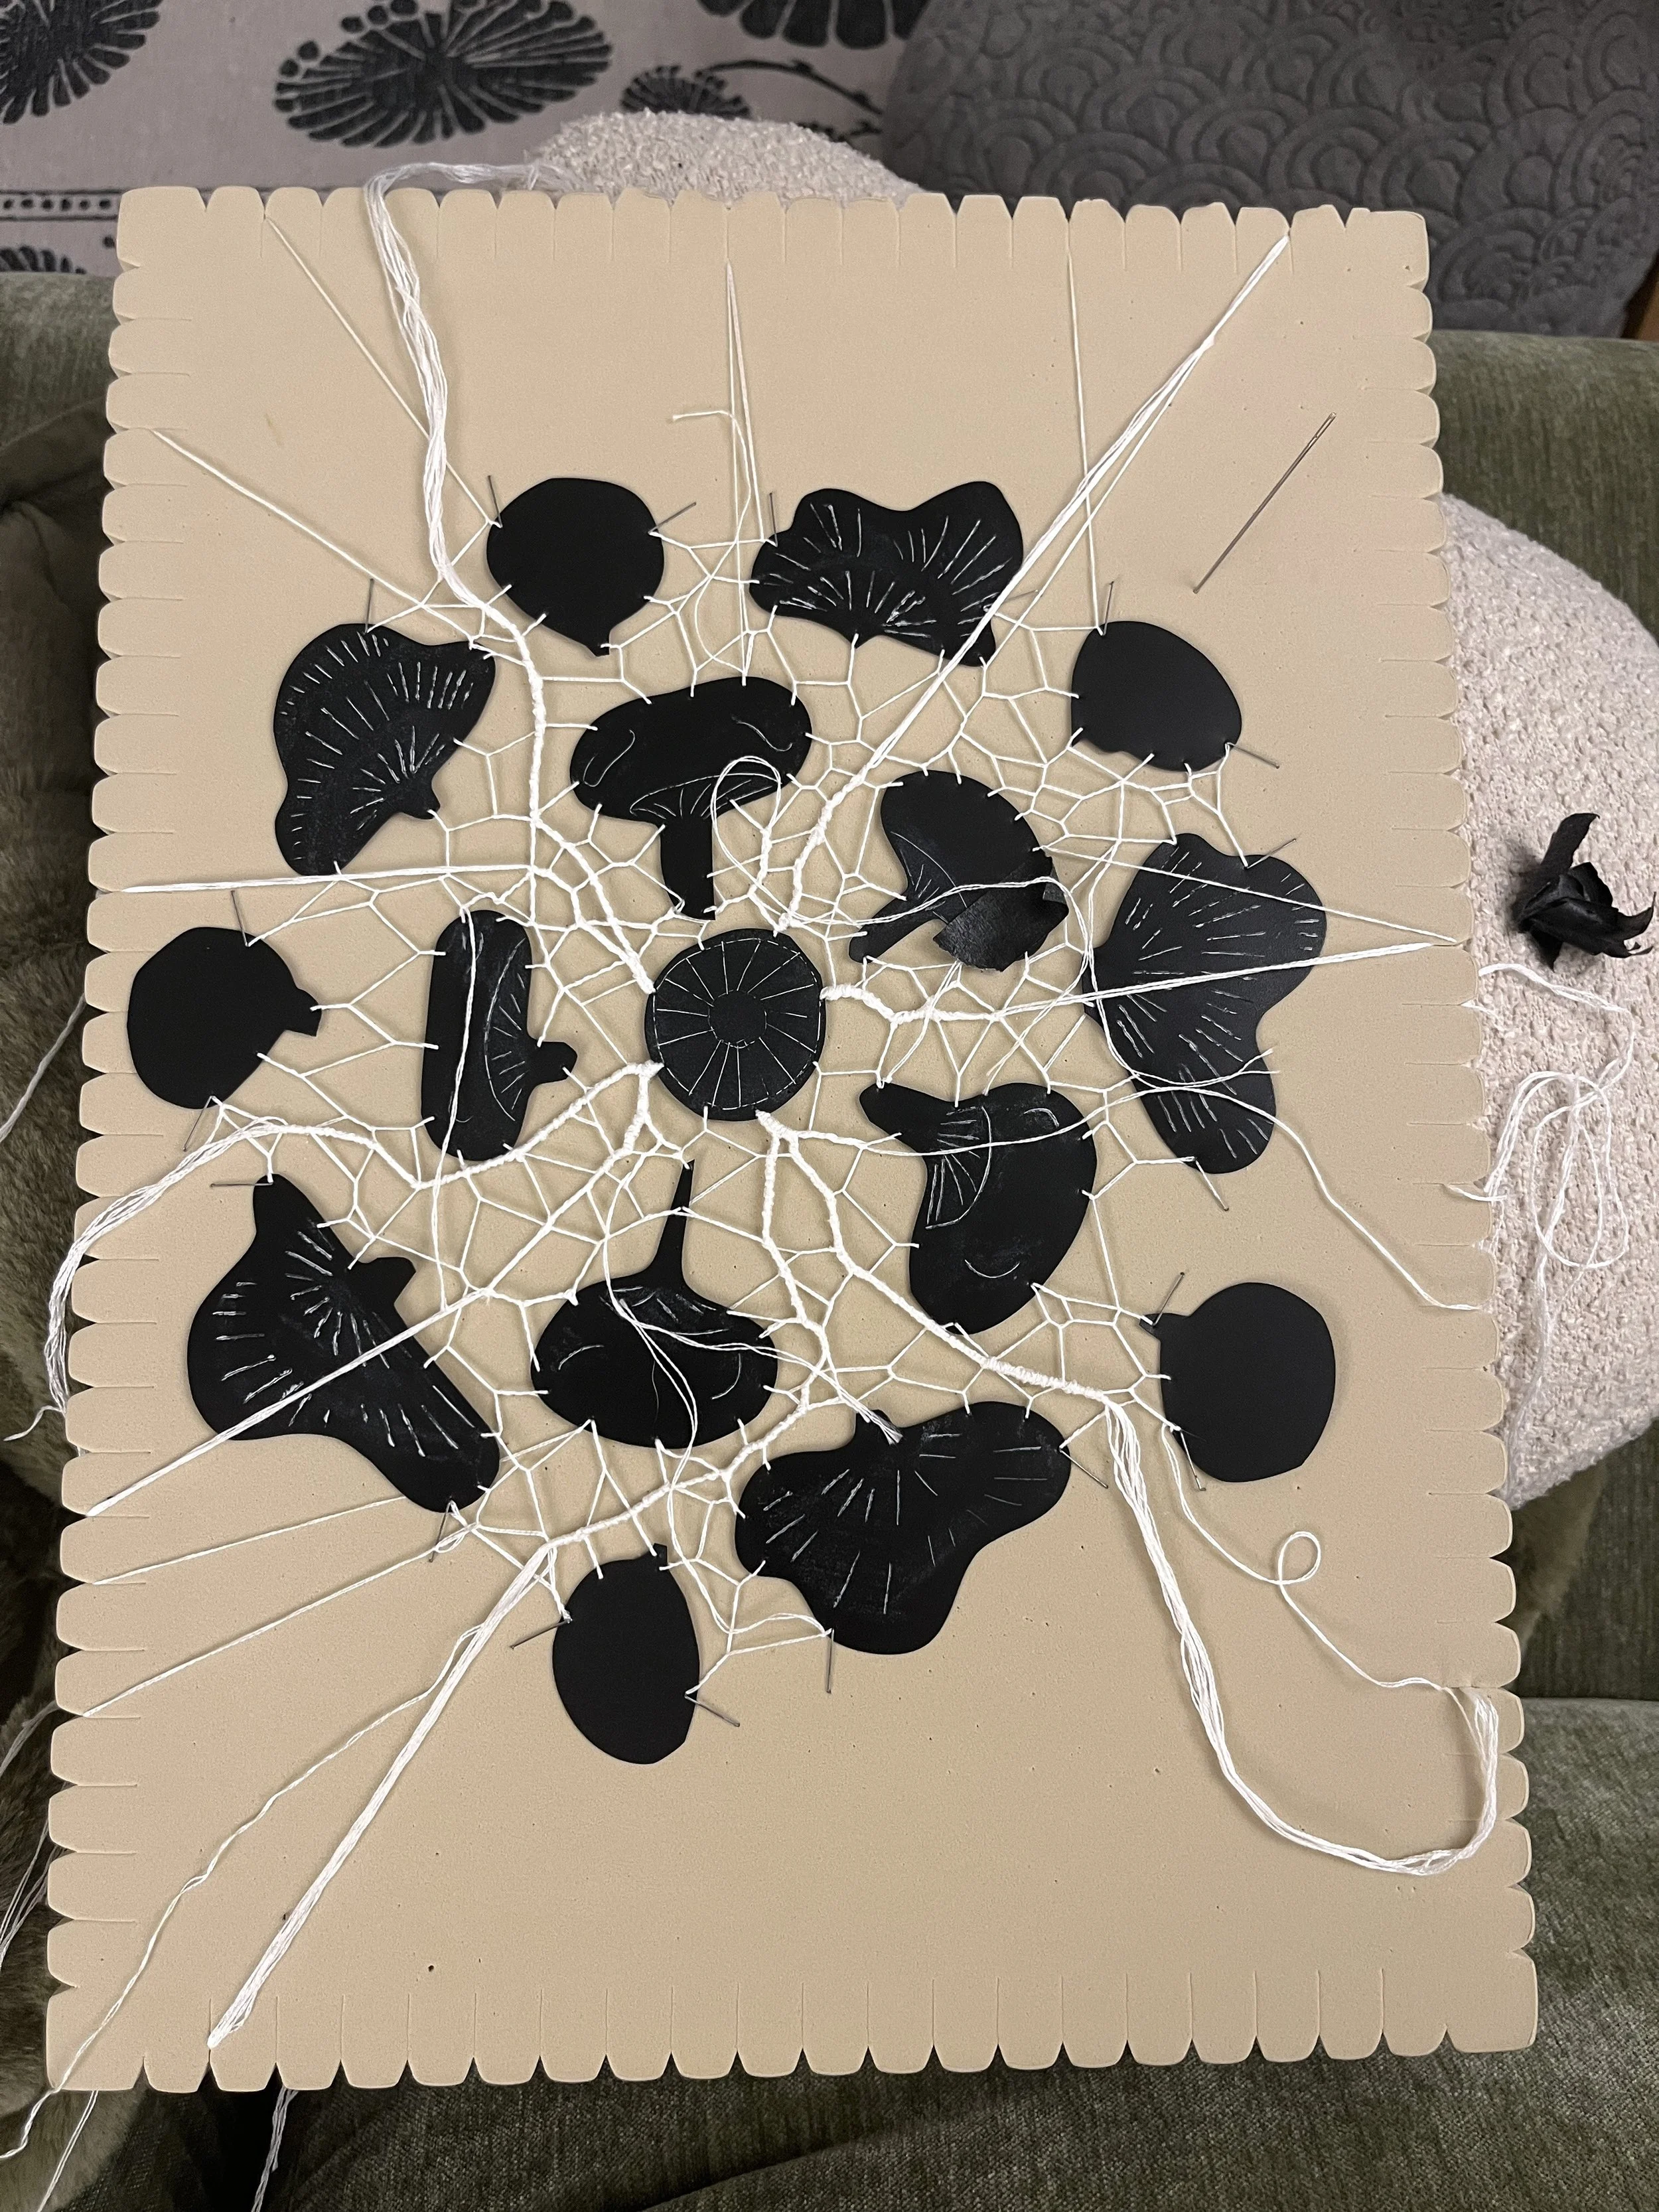
Below is my current sample, and I'm now using folder plastic instead of the paper from my first sample. It is a success, it looks like mycelium!
That discovery has also created a new problem of course. Color.
I initially imagined the veil as monochromatic black, but I'm now using white embroidery floss because mycelium is white. Now I'm wondering if I want the contrast between the white mycelium and the black plastic mushroom fruiting bodies to be really strong, or if I want to soften it with a smoky translucent grey. I also have transparent white plastic folders that I think could be beautiful, but I'm worried it might start looking more like a wedding veil.
So….?
Needle lace also takes forever. I think this sample is about 10 hours of work so far and I'm working pretty quickly and messily. I want to make sure the piece will still sit well as it gets bigger, so I'll be doing more sampling with the grey and white folders directly onto this piece. I'm also thinking about trying some paint to create a transition between the white floss and the black plastic.
All of that said, I think I've figured out the veil.
That feels like a big milestone. And the mycelium makes the concept feel even stronger than it did before. The veil is no longer just a field of mushrooms connected by something that happens to resemble lace. The lace itself becomes part of the mushroom imagery. I really like the idea that the mycelium is moving through the veil and doing some of the work of deposition and grief.
This week is going to be heavy on administrative tasks, so I don't expect any huge studio discoveries. My goal is to make the remaining decisions around the mourning veil so I can keep moving forward with it.
500 Years of Lace History ft Elena Kanagy-Loux - Turns out lace is a broad term, this video helped me get my bearings -
How to make Venetian Needle Lace - Lovely start to finish
Community Lace Project Lesson One - Most helpful was actually learning that she would be connecting the community made lace leaves to each other. I used that to think about my folder mushrooms being separate lace panels that I needed to connect together
How to make a needle lace leaf skeleton - helpful to see someone not making a pattern and building up the thickness of specific stitches above others
(ebook) Beeton’s Book of Needlework - helped me figure out which stitched I wanted and feels like a great resource for the future.