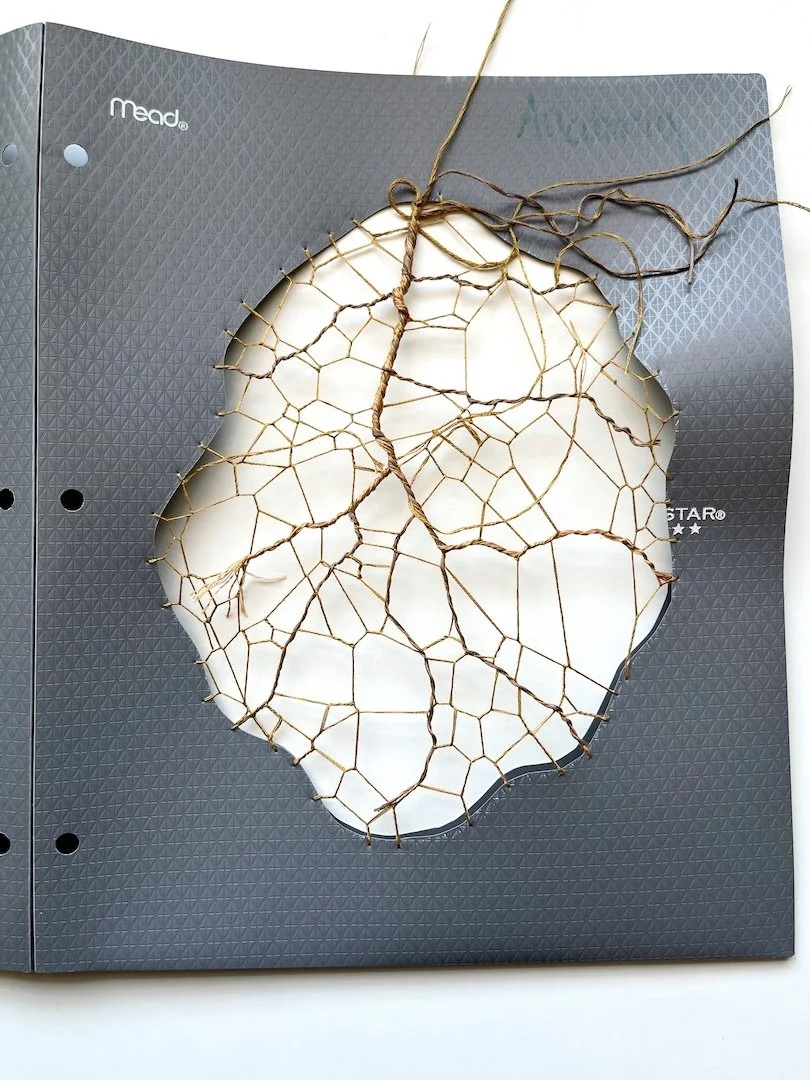
Month 2 of my Austin Creative Reuse residency was all about the Mourning Veil.
Last month I decided to use needle lace to connect the plastic folder mushrooms that make up the veil. But before I could get started on the final piece, there were still several problems to solve. This month was about working through those problems, building my skills, and figuring out how to approach a project that is much larger than anything I’ve attempted before.
building hand confidence
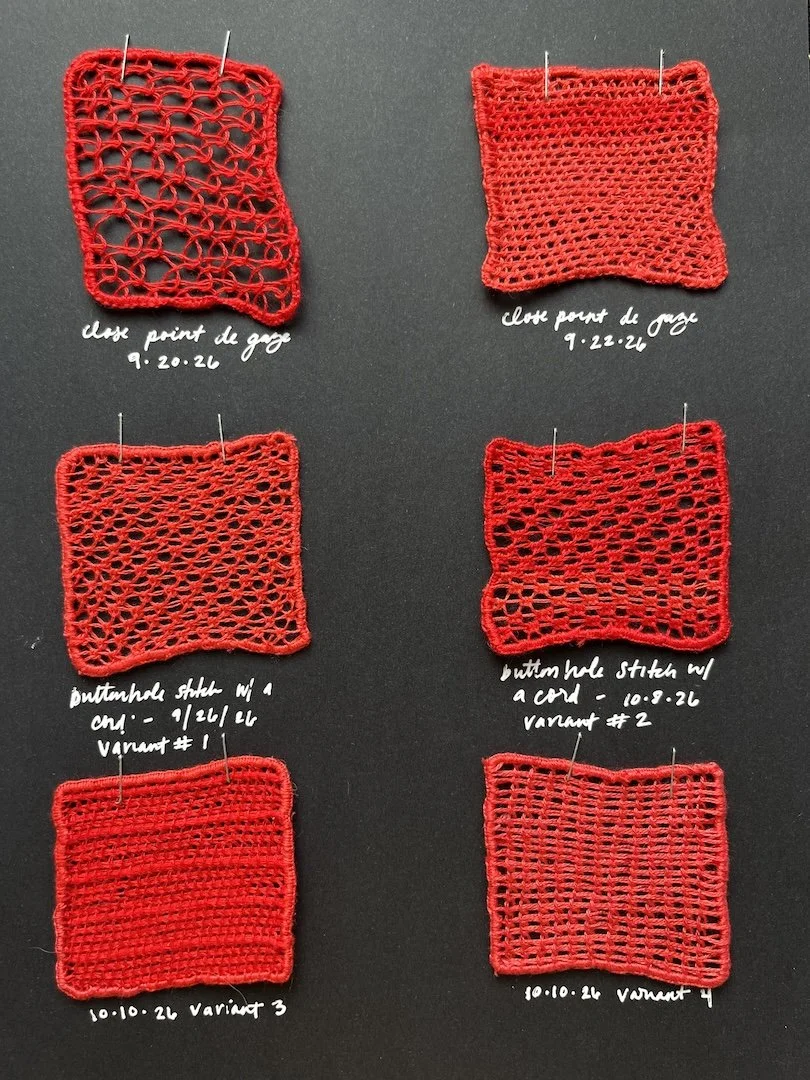
The first thing I needed to do was practice. Needle lace is a new technique for me, and it’s been ages since I’ve done any embroidery. I wanted to build my confidence before committing to the final piece, so I started learning new stitches and making samples from A Practical Guide to Needle Lace by Jacqueline Peter, alongside a class through the Surface Design Association.
In my experience, when you are a beginner at something you can make huge jumps in skill in a relatively short time. The difference between one sample and the next can be obvious. As you become more experienced improvements can be harder to recognize.
I didn’t want to begin a large piece like the Mourning Veil and have those big jumps in skill show up as inconsistencies throughout the work. I wanted to give myself the chance to practice, make mistakes, and become more comfortable with the technique before starting the final piece. So I’ve been making small square samples of different fillings using embroidery floss I’ve held on to for years. Working through these samples has helped me understand the stitches and learn lot about tension control.
As it turns out, I’m also officially obsessed with needle lace. So the practice hasn’t exactly felt like a chore.
working larger scale
My second challenge was figuring out how to work larger.
My original sample was starting to outgrow the foam macramé board I’d been using. I needed a way to work on a larger area while keeping the fabric secure and maintaining the tension I need for the lace.
I switched to a larger felt board to start experimenting with a bigger working area. It still isn’t large enough for the entire veil, but it has been a good next step. I can practice on a larger scale and get a better sense of what I’ll need to do when I begin the full piece.
figuring out the mushroom placement
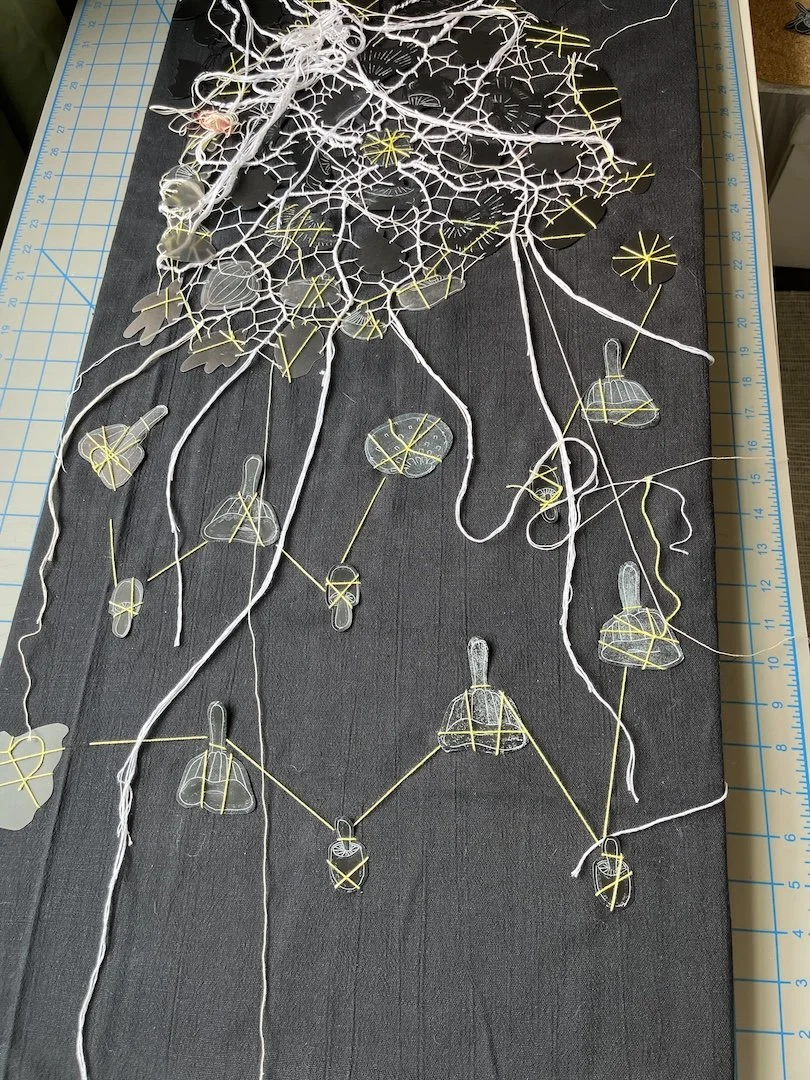
I also wanted to revisit how I was positioning the plastic mushrooms. If you remember my first paper mockup, the mushrooms were arranged with a radial symmetry that I really liked. I wanted to preserve that arrangement while giving the mushrooms more space.
In my first try on the foam board I basically stapled the mushrooms to the board. But that that technique would make it harder to control where the mushrooms go across a larger surface. So I decided to tack them onto fabric and then staple that to the board.
That decision came from something I was learning through traditional needle lace. In this technique, a cordonnet provides a frame for the lace. To create the cordonnet you first sew in temporary stitches that act as channels for the thread that makes up the cordonnet.
I started thinking of the mushrooms as the cordonnet which helped me come up with the idea to temporarily stitch them to the fabric. You can see these stitches in yellow in the image.
I’m hoping this approach will help me get closer to the radial arrangement I imagined in my first mockup while giving me more control over the spacing.
focusing
Month 1 was very much an ideation phase. Every idea that popped into my head was worth following, and I let myself explore different possibilities without worrying too much about which ones would become finished pieces.
That exploration led me in several directions. I began developing the Blackland Prairie stacking ring, started imagining an upside-down crown or veil made from branching roots, and wondered about covering three-dimensional pieces with needle lace.
I’m still excited about all of those ideas. But as I approached the halfway point of the residency and began to understand how much time the Mourning Veil would take, I realized I needed to shift gears. So, for now, the veil is my priority.
redefining progress
I didn’t finish a major piece this month, and I’ll admit I’ve felt a little self-conscious about that.
It’s easy to measure progress by what you can show someone at the end of a month. A finished object is tangible evidence of time spent working. Samples, practice, and problem-solving can be harder to explain, even when they are essential to making the final piece possible.
But I’m learning an entirely new skill, and I’ve fallen in love with it. I’ve also worked through several practical questions that were keeping me from starting the veil.
I’m reminding myself that this is progress, too.
Sometimes success looks like finishing a piece. Sometimes it looks like learning how to make the piece possible in the first place.
As I move into Month 3, I’m hoping to resolve the last few technical questions and finally begin working on the full Mourning Veil. I know there will probably be more things to figure out along the way, but I feel much better prepared to take that next step.
I am keeping a more detailed blog full of rambling ideas and loads more pictures of things in progress so if you have made it to the end of this post and somehow still want more you can find that here!